RTX1200 filterでルーティング追加

IPv4とIPV6の2つのPPPoEセッションでデュアルスタック運用してますが

フレッツ光ネクストが3セッション可能な契約なので、もうひとつISPを追加する為

RTX1200の設定を変更しました。

現状、IPv4(PP1)は/29でもらっているので、サーバー用にIP2つ、2つのローカルエリアネットワークから

それぞれNATで出る為に2IP使用しています。IPv6(PP2)はRAまかせです。

そこにPP3を追加するわけですが、ルーティングをどうするかです。

そこでデフォルトルートにフィルターかけて家庭用のLANをpp3に向けることにしました

現状のルーティング(他の拠点へのルートはIPsecトンネルへ向けています。)

ip route default gateway pp 1

ip route 192.168.0.0/24 gateway tunnel 1

ip route 192.168.1.0/24 gateway tunnel 2

ip route 192.168.2.0/24 gateway tunnel 3

ip route 192.168.3.0/24 gateway tunnel 4

ip route 192.168.4.0/24 gateway tunnel 5

ip route 192.168.5.0/24 gateway tunnel 6

ip route 192.168.6.0/24 gateway tunnel 7

ip route 192.168.7.0/24 gateway tunnel 8


新設定

新しく新ISP用にPP3を作成する

pp select 3

ip pp nat descriptor 100

pp enable 3

デフォルトルートに追加設定

ip route default gateway pp 1 gateway pp 3 filter 100

フィルター100に合致したものはPP3にルーティングされます。

ip filter 100 pass 192.168.99.2-192.168.99.254 * * * *

この設定では、192.168.99.0/24のネットワークからのルートがPP3にルーティングされます。

nat descriptor address inner 100 192.168.99.2-192.168.99.254

natの設定も必要ですが、nat descriptor address inner の設定だけで動作しています。


ソフトバンクiPhone5キャリアアップデート開始(forテザリング)

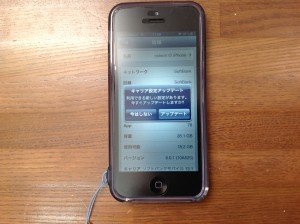
本日iPhone5にキャリアアップデートの通知がありました。

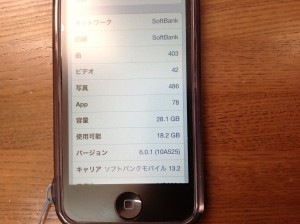
これを適用すると、13.1⇒13.2にアップデートされます。

12月15日にならないと使用できないようですが。

PPTPによるVPN接続が出来るか?テザリング接続した端末からも同様のことが出来るのか

興味津々ですが・・・・

送信ドメイン認証導入総括

そもそもDKIMの導入メリットとは何でしょうか?

2012年5月に総務省が取りまとめた、ISP4社(YAHOO!、ビッグローブ、IIJ、ニフティ)の

DKIM=passとなったメールの割合は25%です。

http://www.soumu.go.jp/main_sosiki/joho_tsusin/d_syohi/pdf/120726_3.pdf

DKIM署名をしているISPでもこの割合ですので他のISPではもっと下がるでしょう。

この程度の普及率では、DKIM=pass以外のメールを拒否したり迷惑メールとすることは

とても出来ません。

では何の為?といわれたらDKIM認証が通らないメールはSPAM扱いですよ~っというISPが

今後増えてこないとも限りませんのでそのための対策です。

自メールサーバーは、DKIMでフィルタリングするつもりは毛頭ありません。

数年前からS25Rというスパム対策をしていてこれが高い効果を得ております。

これは送信元のメールサーバのアドレスからメールサーバがエンドユーザー回線(動的IP)から

発信しているか判断し450を返すという仕組みで⇒S25Rインタビュー記事

これを導入してから高いspamメールフィルタ効果を得ております。

こちらもご覧になってみてください。送信ドメイン認証はスパムに勝てないだろう

最後にyahoo.co.jpあてに送ったメールのヘッダーを記して終了します。

ヤフー宛メールのヘッダー(DKIM署名付けても迷惑メール扱いです笑)

From =?iso-2022-jp?B?GyRCI0gjUyVGJUMlLxsoQiAbJEJMWkI8GyhC?= Mon Dec 3 22:53:43 2012
X-Apparently-To:ikuko_kimura@yahoo.co.jp via 183.79.100.204; Mon, 03 Dec 2012 22:53:47 +0900
Return-Path:<yoshio@hstech.net>
X-YahooFilteredBulk:219.105.37.35
Originating-IP:[219.105.37.35]
Received-SPF:pass (dns2.hstech-net.com: domain of yoshio@hstech.net designates 219.105.37.35 as permitted sender) 
receiver=dns2.hstech-net.com; client-ip=219.105.37.35; envelope-from=yoshio@hstech.net;
Authentication-Results:mta505.mail.kks.yahoo.co.jp from=hstech.net; domainkeys=pass (ok); dkim=pass (ok) header.i=@hstech.net
Received:from 219.105.37.35 (EHLO dns2.hstech-net.com) (219.105.37.35) by mta505.mail.kks.yahoo.co.jp with SMTP; Mon, 03 Dec 2012 22:53:46 +0900
Received:from dns2.hstech-net.com (localhost [127.0.0.1]) by dns2.hstech-net.com (Postfix) with ESMTP id 5EB706203FA for <ikuko_kimura@yahoo.co.jp>; Mon, 3 Dec 2012 22:53:48 +0900 (JST)>
DKIM-Signature:=1; a=rsa-SHA256; c=relaxed; d=hstech.net; h=message-id :from:to:subject:date:mime-version:content-type :content-transfer-encoding; s=hstech; bh=cm3wifXTQb1BDJmgLrqwHaa Kt7jTusy9rHJ3pkuNlJs=; b=BF8VIXEciEo2HIIImrwQsbLKwuW40OV1McyGZrJ 9AjPMIyPq1gSPruzvF8g4Edh1m8ZOlJoeynXIlsCmoq1RIY1dvZSZHDXFRHH8qmS LgSNhg/z8eLqWZhneS75mGNNc1HC74NOd96JgLjiBP/V+kSsl72zXdCbSWE7Of2Z E73U=
DomainKey-Signature:a=rsa-SHA1; c=nofws; d=hstech.net; h=message-id :from:to:subject:date:mime-version:content-type :content-transfer-encoding; q=dns; s=hstech; b=UY4o/qSUkaQLAfMtn PtvnHwHzCiNkkYC2uTKB5HeMEJddRjYe4ctqASTr9BoCy7qkH1q6zyp/VMJGsJxW yJqADBiDvZOcit/UyBO439/wJgkVYbJu58H4dqNIs6JeuGlAZgI8MfR+XS0OP8nn w3/mpwlyjDHZ4RPieRw0EaBz+w=
Received:
from hstechPC1 (unknown [192.168.120.101]) by dns2.hstech-net.com (Postfix) with ESMTP id 49EBF6203DA for <ikuko_kimura@yahoo.co.jp>; Mon, 3 Dec 2012 22:53:48 +0900 (JST)
Message-ID:DDEA1A44372E4F12B8A8CCB8553D6E96@hstechPC1>
From:=?iso-2022-jp?B?GyRCI0gjUyVGJUMlLxsoQiAbJEJMWkI8GyhC?= yoshio@hstech.net


DKIMproxy導入覚書-はまり処満載で撃沈寸前!その3

いよいよ署名を付けてみます。

他の設定は済んでいるので、postfixのmaster.cfに記述するだけです。

参考サイト: http://dkimproxy.sourceforge.net/postfix-outbound-howto.html
sasl-authで587番ポートを使用しているのでこのポートに来たメールのみ署名をします。

# # modify the default submission service to specify a content filter

# and restrict it to local clients and SASL authenticated clients only #

submission  inet  n     -       n       -       -       smtpd

-o smtpd_etrn_restrictions=reject

-o smtpd_sasl_auth_enable=yes

-o content_filter=dksign:[127.0.0.1]:10027

-o receive_override_options=no_address_mappings

-o smtpd_client_restrictions=permit_sasl_authenticated,reject

マイネットワーク以外からの送信が出来ないのでこの行を追加しました。

-o smtpd_recipient_restrictions=permit_mynetworks,permit_sasl_authenticated,reject

#

# specify the location of the DKIM signing proxy

# Note: we allow "4" simultaneous deliveries here; high-volume sites may

#   want a number higher than 4.

# Note: the smtp_discard_ehlo_keywords option requires Postfix 2.2 or

#   better. Leave it off if your version does not support it.

#

dksign    unix  -       -       n       -       4       smtp

-o smtp_send_xforward_command=yes

-o smtp_discard_ehlo_keywords=8bitmime,starttls

#

# service for accepting messages FROM the DKIM signing proxy

#

127.0.0.1:10028 inet  n  -      n       -       10      smtpd

-o content_filter=

-o receive_override_options=no_unknown_recipient_checks,no_header_body_checks

-o smtpd_helo_restrictions=

-o smtpd_client_restrictions=

-o smtpd_sender_restrictions=

-o smtpd_recipient_restrictions=permit_mynetworks,reject

-o mynetworks=127.0.0.0/8

-o smtpd_authorized_xforward_hosts=127.0.0.0/8

さていよいよ送信テストです。sa-test@sendmail.net へメールを送信します。

程なく返信メールが来ました、さて結果は、

sendmail.net Sender Authentication Auto-Responder $Revision: 1.19 $
This service runs at <sa-test@sendmail.net> and allows remote users

to perform a simple, automated test to see if different Sender

Authentication schemes are working.  Mail sent to this service

is checked by our Sender Authentication filters for any valid

credentials or signatures.  A script receives the message, checks

for a special header with the results of the tests, and composes

this response message based on what it finds.  This response is also

signed with DomainKeys Identified Mail (DKIM).
Please note that the DKIM filter signing this reply message conforms

to the latest IETF standard version, and thus may not be successfully

verified by older implementations.  If you are using dkim-filter from

Sendmail, Inc., upgrade to OpenDKIM to be compatible with the most

recent version of DKIM.
Note that DomainKeys has been removed in favor of DKIM.  Sites still

using DomainKeys should upgrade to DKIM ASAP.
We hope this service has been helpful to you.
Authentication System:       DomainKeys Identified Mail (DKIM)

Result:                   DKIM signature confirmed GOOD 
Description:              Signature verified, message arrived intact

Reporting host:           services.sendmail.com

More information:         http://dkim.org/

Sendmail milter:          http://opendkim.org/
Authentication System:       Sender ID

Result:                   SID data confirmed GOOD

Description:              Sending host is authorized for sending domain

Reporting host:           services.sendmail.com

More information:         http://www.microsoft.com/senderid

Sendmail milter:          https://sourceforge.net/projects/sid-milter/
Authentication System:       Sender Permitted From (SPF)

Result:                   SPF data confirmed GOOD

Description:              Sending host is authorized for sending domain

Reporting host:           services.sendmail.com

More information:         http://openspf.org/

あれっ!

DKIM signature confirmed GOOD

ということは、DNSのドメインキーレコードは正常ということになりますね???

ためしにこちらのサイトで再検証してみました。

http://dkimcore.org/tools/dkimrecordcheck.html

結果は This is a valid DKIM key record

DNSの設定はこのままで良さそうです???あの一日はなんだったんだろう


DKIMproxy導入覚書-はまり処満載で撃沈寸前!その2

DKIMproxyオフィシャルサイト

秘密鍵・公開鍵を作成したので、DNSゾーンファイルを編集します。

ポリシーレコード、セレクターレコード、2つのレコードを追加

ポリシーレコード、

_policy._domainkey.hstech.  600 IN  TXT "t=y; o=~; r=yoshio@hstech.net"
hstech._domainkey.hstech.net.   600 IN  TXT "t=y; k=rsa; p=公開鍵"

下記サイトでポリシレコードのチェックをします。
http://domainkeys.sourceforge.net/policycheck.html
結果は

 Testing hstech.net
Policy TXT=t=y;o=~;n=;r=yoshio@hstech.net;This policy record appears valid.

OKのようです。
次に下記サイトでセレクターレコードのチェックをします。
http://domainkeys.sourceforge.net/selectorcheck.html
結果は

hstech._domainkey.hstech.net
TXT Record length = 229
p=MIGfMA0GCSqGSIb3DQEBAQUAA4GNADCBiQKBgQDCXxC8mmzt/x8VFnbzPWH1dSw/FU5qoIafLdCAqt

...aP8T1NhBvthFpKQku3gcTs72xZrj0h/I0dmzoFyI+f/emJ7VHuFPfYIyi8dwAc+Qq2vrJmKPYey3vL4q

...Im1SEyYWB4fzUdU9CynjOBeT+RziZcHIroQuQeWVXToqxuzAhaJQIDAQAB;k=rsa;t=y;

This selector is in error: Tag 'p': Invalid public key has no modulus

む!なんじゃいノーモデュラスって????

検索してみましたが思うような答えが見つかりません。

オフィシャルサイトの指示通り

Generate a private/public key pair using OpenSSL:

openssl genrsa -out private.key 1024
openssl rsa -in private.key -pubout -out public.key

と鍵を再作成しても結果は同じでした。
ここで1日はまりました。とりあえずDKIMproxyを動作させて、吐かれるエラーメッセージ等から
解決策を探ろうと思い、DKIMproxyの設定をすることにしました。
変更箇所は太字部分のみ

/usr/local/dkimproxy/etc/dkimproxy_in.conf
# specify what address/port DKIMproxy should listen on

listen    127.0.0.1:10025

# specify what address/port DKIMproxy forwards mail to

relay     127.0.0.1:10026
/usr/local/dkimproxy/etc/dkimproxy_out.conf

# specify what address/port DKIMproxy should listen on listen    127.0.0.1:10027

# specify what address/port DKIMproxy forwards mail to relay     127.0.0.1:10028

# specify what domains DKIMproxy can sign for (comma-separated, no spaces)

domain    hstech.net,parts-recycle.net,hair-saloon.net

# specify what signatures to add simple

signature dkim(c=relaxed,a=rsa-SHA256)

signature domainkeys(c=nofws,a=rsa-SHA1)

# specify location of the private key

keyfile   /usr/local/dkimproxy/private.key

# specify the selector (i.e. the name of the key record put in DNS)

selector  hstech 
# control how many processes DKIMproxy uses

#  - more information on these options (and others) can be found by

#    running `perldoc Net::Server::PreFork'. #min_servers 5 #min_spare_servers 2

DKIMproxyの解凍ディレクトリから起動ファイルを/etc/rc.d/init.d/にリネームしてコピー

sample-dkim-init-script.sh ⇒ /etc/rc.d/init.d/dkimproxy

これでDKIMproxyの設定は終了

次に以下のサイトを参照しpostfixのmaster.cfを変更します。

http://dkimproxy.sourceforge.net/postfix-inbound-howto.html

これで受け取ったメールの検証が出来ます。

ためしにDKIM署名をしているgmailとしていないplalaのメールのヘッダーを比較してみます

gmailヘッダー(抜粋)

Return-Path: <hstech99@gmail.com>

Received: from dns2.hstech-net.com ([unix socket])

by dns2.hstech-net.com (Cyrus v2.2.13p1-Invoca-RPM-2.2.13p1-4vl4) with LMTPA;

Fri, 30 Nov 2012 14:25:24 +0900

X-Sieve: CMU Sieve 2.2

Received: from dns2.hstech-net.com (localhost [127.0.0.1])

by dns2.hstech-net.com (Postfix) with ESMTP id 735426203F6

for <yoshio@hstech.net>; Fri, 30 Nov 2012 14:25:24 +0900 (JST)

Authentication-Results: dns2.hstech-net.com; dkim=pass header.i=@gmail.com 
X-DKIM-Authentication-Results: pass 

Received: from mail-ie0-f176.google.com (mail-ie0-f176.google.com [209.85.223.176])

by dns2.hstech-net.com (Postfix) with ESMTP

for <yoshio@hstech.net>; Fri, 30 Nov 2012 14:25:24 +0900 (JST)

Received: by mail-ie0-f176.google.com with SMTP id 13so124242iea.7

for <yoshio@hstech.net>; Thu, 29 Nov 2012 21:25:23 -0800 (PST)

DKIM-Signature: 略

検証結果=pass が確認できます。

plalaヘッダー(大部分略)

Return-Path: <hskimura@blue.plala.or.jp>

Received: from dns2.hstech-net.com ([unix socket])

by dns2.hstech-net.com (Cyrus v2.2.13p1-Invoca-RPM-2.2.13p1-4vl4) with LMTPA;

Sat, 01 Dec 2012 09:37:55 +0900

X-Sieve: CMU Sieve 2.2

Received: from dns2.hstech-net.com (localhost [127.0.0.1])

by dns2.hstech-net.com (Postfix) with ESMTP id 581816203D7

for <yoshio@hstech.net>; Sat,  1 Dec 2012 09:37:55 +0900 (JST)

Authentication-Results: dns2.hstech-net.com;

X-DKIM-Authentication-Results: none

これで受信メールの検証確認が出来ました。

次はいよいよ署名を付ける設定です。でもまだまだ先は長いかも・・・・・